
Since the iPhone 14 series, physical SIM slots were dropped entirely in the US, and eSIMs are fast taking over from old-school physical SIM cards everywhere else. eSIMs might be from your main mobile carrier or be a temporary third-party plan used for avoiding roaming charges when travelling.
There are times when you need to delete the eSIM. Deleting an eSIM from an iPhone is simple – and we’ll show you exactly how to do this here – but there are a few factors to consider to be ready for the task.
For example, when switching to a new carrier, you will likely need to delete the existing eSIM before setting up the new one. If you are upgrading to a new iPhone, before you can transfer your eSIM to the new phone, you will need to delete it from your old device. The same goes if you are selling your old iPhone – removing the eSIM protects your personal information and privacy, plus will make things easier for the new owner.
eSIMs are now a popular way of avoiding hefty roaming charges when abroad. Once you are back home, you may want to remove the now not-so-useful eSIM from your phone.
iPhones can hold up to eight eSIMs, but only two can be active at the same time. Streamlining the number of eSIMs on your phone simplifies matters, especially if any of the eSIMs are no longer operational or needed.
You are deleting the eSIM’s profile, not the eSIM itself
An eSIM is an ‘Embedded SIM’ that is built directly into the iPhone, and you can reprogram it to accept different providers as you desire. You are not really deleting the eSIM as such, but deleting the installed eSIM profile – like uninstalling an app.
When you install an eSIM, your iPhone downloads and stores data such as the SIM card details and network settings from the eSIM’s cellular network.
Deleting the eSIM means you are merely erasing that stored data. For all intents and purposes, it will be like that specific eSIM never existed.
Read our explainer if you want to know more about what an eSIM is and how it works.
Before you delete the eSIM on your iPhone
- As you need internet access to download a new eSIM profile, make sure that you have access to another active cellular connection or a trusted Wi-Fi network.
- Check with the eSIM carrier that deleting the eSIM will cancel your cellular plan, so that you aren’t unwittingly still being charged for the service. It’s likely that you will be warned about this just before you confirm the deletion, so pay attention. Each provider should have a process for cancellation.
- Deleting an eSIM will remove the associated phone number and service from your iPhone. As most eSIMs can be installed only once, decide whether to instead deactivate it if you think you might need it again in the future.
Simon Jary
How to delete an eSIM from an iPhone
This part is easy, but do make sure you have followed our advice above before deleting the eSIM.
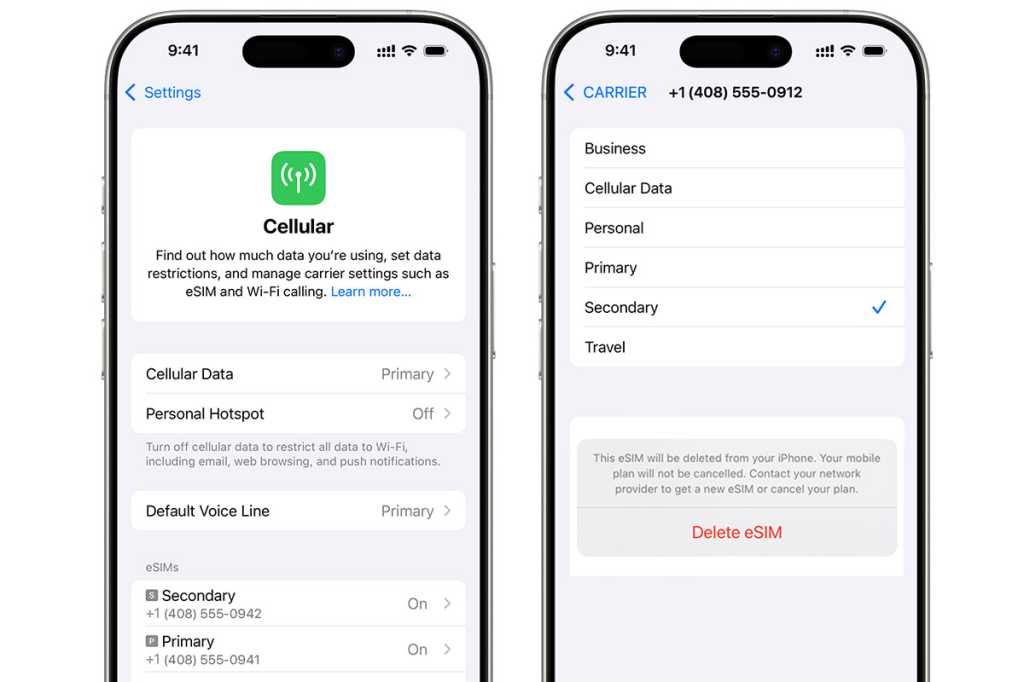
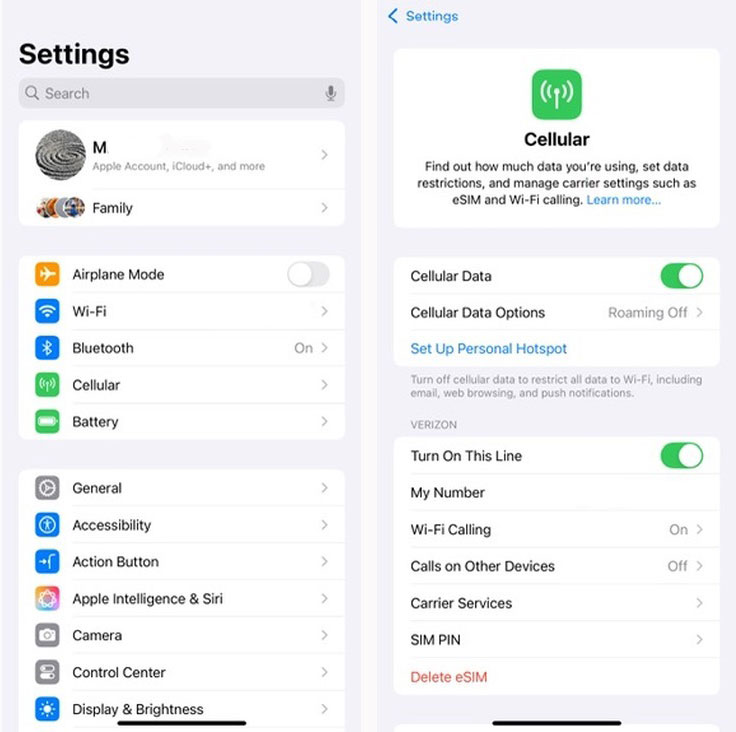
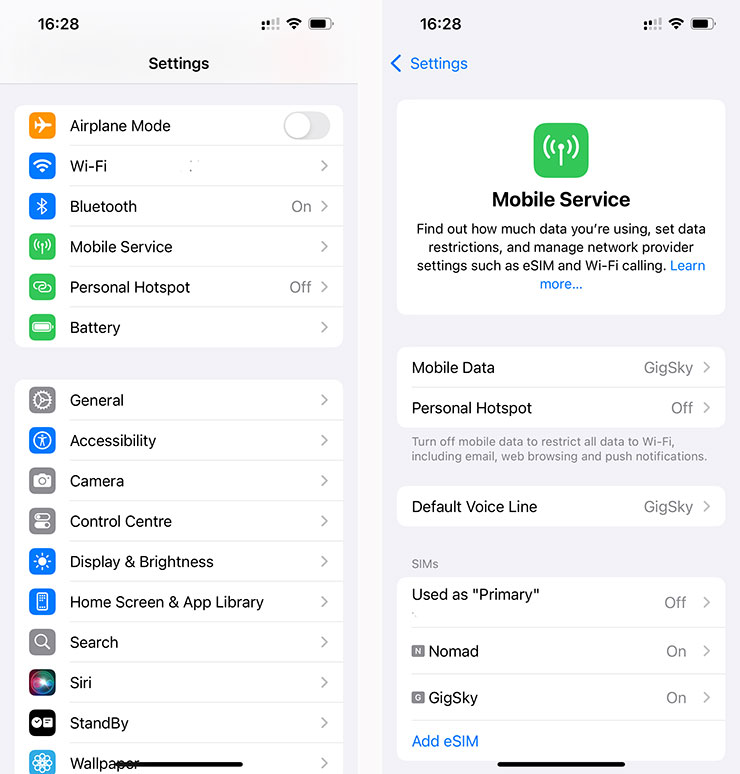
- On your iPhone, go to Settings
- Now click on Cellular (or in the UK, Mobile Service). This is the setting where you can manage the cellular/mobile plans on your iPhone.
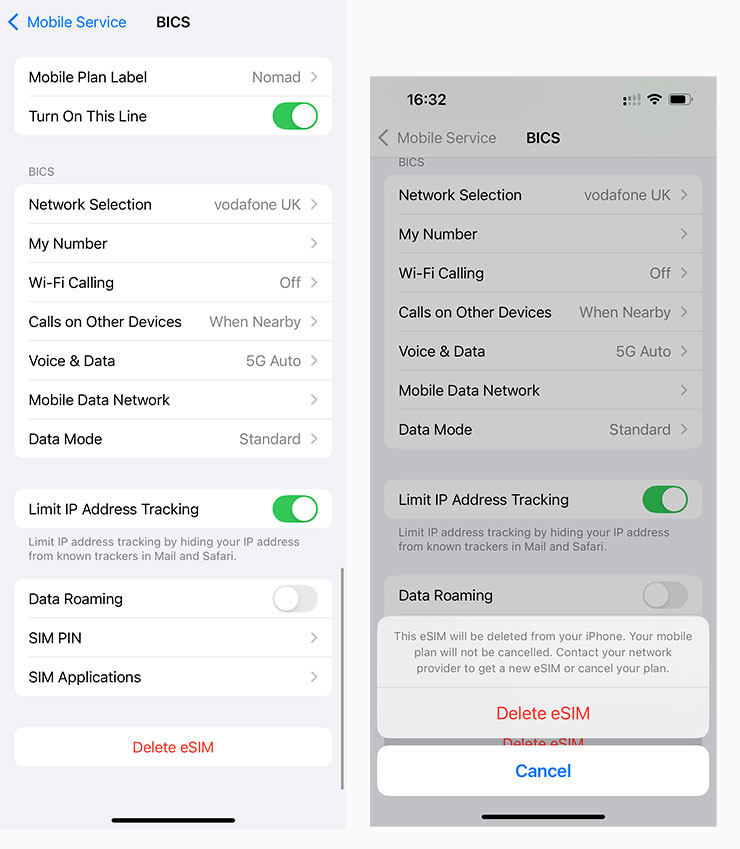
- Find and select the eSIM plan that you wish to remove: there will be a list of the installed eSIM profiles. Now tap the one you wish to delete.
- Delete the eSIM: For iPhones with a single eSIM plan, simply tap “Delete eSIM“. If you have multiple eSIMs, make sure you tap the specific plan that you want to erase, and then tap “Delete Plan.” You’ll be prompted to confirm your selection. The eSIM profile on your device will be immediately removed.
Simon Jary
Simon Jary
Above: The Settings as seen on a UK iPhone (where the setting is “Mobile Service” rather than “Cellular”).
With two eSIMs installed, as well as a physical main carrier SIM card, the process requires an extra click as you must select the specific eSIM that you wish to remove.
We’ve also put together a comprehensive guide on the best eSIM plans for travel, business and home use.